< Previous
Next >
REAR PARKING BRAKE CABLE REMOVAL/INSTALLATION
1. Disconnect the negative battery cable. (See NEGATIVE BATTERY CABLE DISCONNECTION/CONNECTION.)
2. Remove the following parts:a. Selector lever knob (with AT vehicles) (See AUTOMATIC TRANSMISSION SHIFT MECHANISM REMOVAL/INSTALLATION.)b. Shift lever knob (with MT vehicles) (See TRANSMISSION REMOVAL/INSTALLATION [M66M-D].)c. Shift panel component (See SHIFT PANEL REMOVAL/INSTALLATION.)d. Upper panel (See UPPER PANEL REMOVAL/INSTALLATION.)
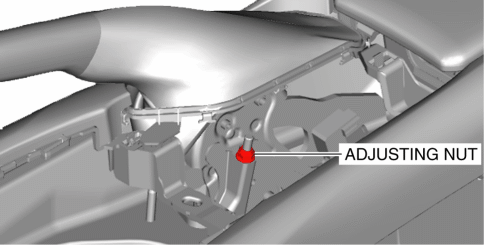
3. Loosen the adjusting nut.
4. Remove the bolt.
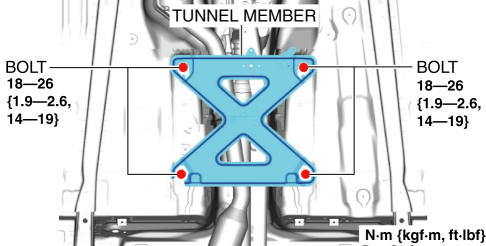
5. Remove the tunnel member.
6. When working on the left side of the vehicle, remove the floor under cover. (See FLOOR UNDER COVER REMOVAL/INSTALLATION.)
7. Remove in the order indicated in the table.
8. Install in the reverse order of removal.
9. After installation, inspect the parking brake lever stroke. (See PARKING BRAKE LEVER INSPECTION.)

| 1 |
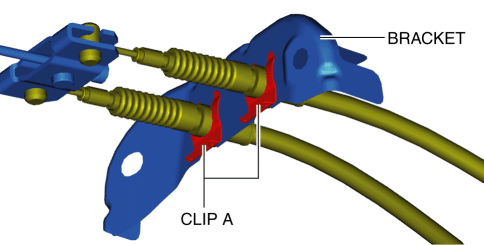
Clip A (See Clip A Installation Note.) |
| 2 |
Rear parking brake cable (equalizer side) |
| 3 |
Clip B |
| 4 |
Bolt |
| 5 |
Bracket |
| 6 |
Clip C (See Clip C Installation Note.) |
| 7 |
Rear parking brake cable (rear brake side) |
Clip C Installation Note
1. Install clip C to the position shown in the figure.
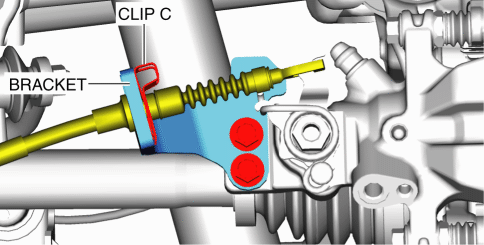
Bracket, Bolt Installation Note
1. Install the bracket hook to the rear crossmember.
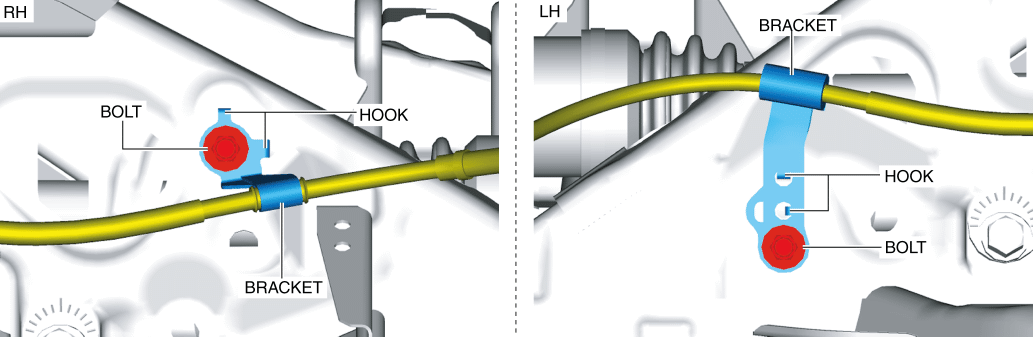
2. Install the bolt.Tightening torque
22—30 N·m {2.3—3.0 kgf·m, 17—22 ft·lbf}
Clip A Installation Note
1. Install clip A to the position shown in the figure.< Previous Next >