< Previous
Next >
WASHER TANK REMOVAL/INSTALLATION
Without Washer Fluid-level Sensor
1. Disconnect the negative battery cable. (See NEGATIVE BATTERY CABLE DISCONNECTION/CONNECTION.)
2. Drain the washer fluid.NOTE:
If the procedure is performed with washer fluid in the washer tank, the washer fluid may leak out. Drain the washer fluid before performing the procedure.
3. Remove the nut.
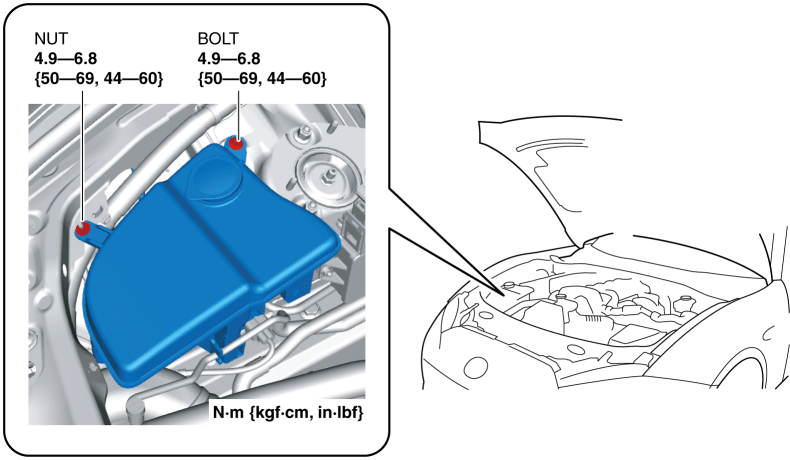
4. Remove the bolt.
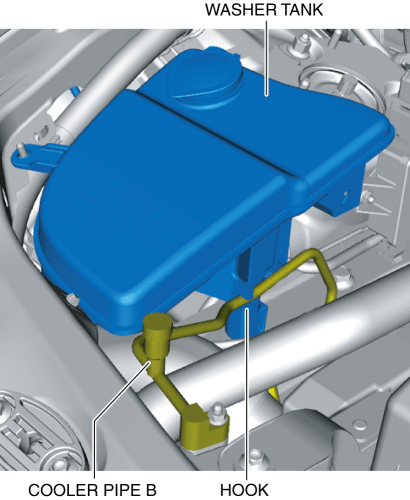
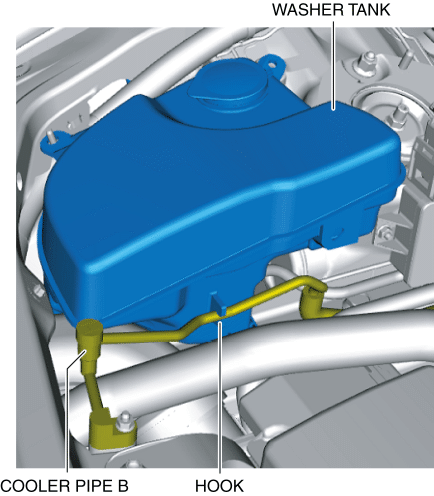
5. Pull cooler pipe B out from the washer tank hook.
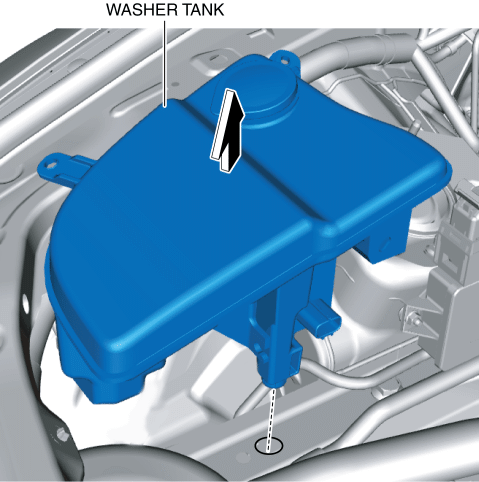
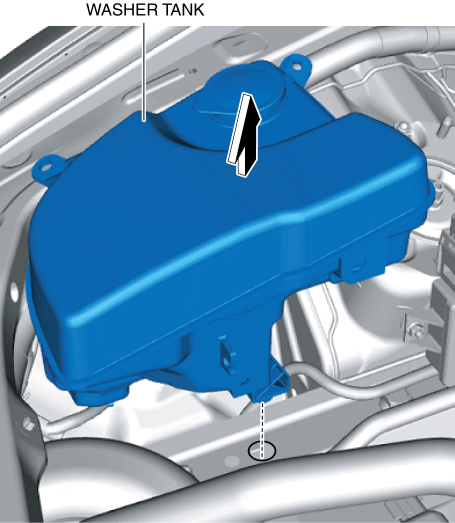
6. Lift the washer tank in the direction of the arrow shown in the figure.
7. Disconnect the connectors.
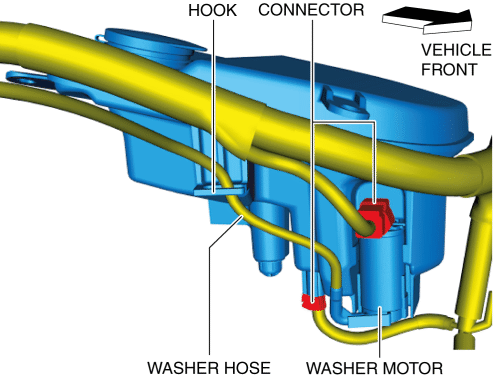
8. Disconnect the washer hose from the washer motor.
9. Pull the washer hose out from the washer tank hook.
10. Remove the washer tank.
11. When replacing the washer tank, remove the washer motor. (See WASHER MOTOR REMOVAL/INSTALLATION.)NOTE:
If the washer motor is not malfunctioning, install the washer motor to a new washer tank.
12. Install in the reverse order of removal.
With Washer Fluid-level Sensor
1. Disconnect the negative battery cable. (See NEGATIVE BATTERY CABLE DISCONNECTION/CONNECTION.)
2. Drain the washer fluid.NOTE:
If the procedure is performed with washer fluid in the washer tank, the washer fluid may leak out. Drain the washer fluid before performing the procedure.
3. Remove the nut.

4. Remove the bolt.
5. Pull cooler pipe B out from the washer tank hook.
6. Lift the washer tank in the direction of the arrow shown in the figure.
7. Disconnect the connectors.
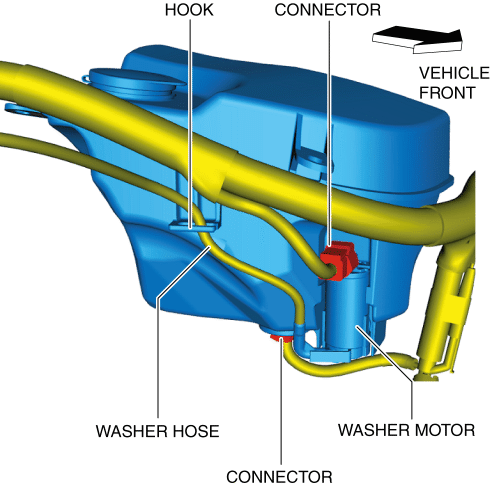
8. Disconnect the washer hose from the washer motor.
9. Pull the washer hose out from the washer tank hook.
10. Remove the washer tank.
11. When replacing the washer tank, remove the following parts:a. Washer motor (See WASHER MOTOR REMOVAL/INSTALLATION.)b. Washer fluid-level sensor (See WASHER FLUID-LEVEL SENSOR REMOVAL/INSTALLATION.)NOTE:
If the above parts are not malfunctioning, install the above parts to a new washer tank.
12. Install in the reverse order of removal.< Previous Next >