< Previous
Next >
CHARCOAL CANISTER REMOVAL/INSTALLATION [SKYACTIV-G 2.0]
U.S.A. and CANADA Specs.
1. Disconnect the negative battery cable. (See NEGATIVE BATTERY CABLE DISCONNECTION/CONNECTION.)
2. Remove in the order indicated in the table.
3. Install in the reverse order of removal.
Step 1
| 1 |
Connector |
| 2 |
Evaporative hose No.1 (body side) |
| 3 |
Evaporative hose No.2 |
| 4 |
Evaporative hose No.3 |
| 5 |
Quick release connector (See QUICK RELEASE CONNECTOR (EMISSION SYSTEM) REMOVAL/INSTALLATION [SKYACTIV-G 2.0].) |
| 6 |
Charcoal canister component |
| 7 |
CV solenoid valve connector |
| 8 |
Fuel tank pressure sensor connector |
| 9 |
Harness clip |
Step 2
| 1 |
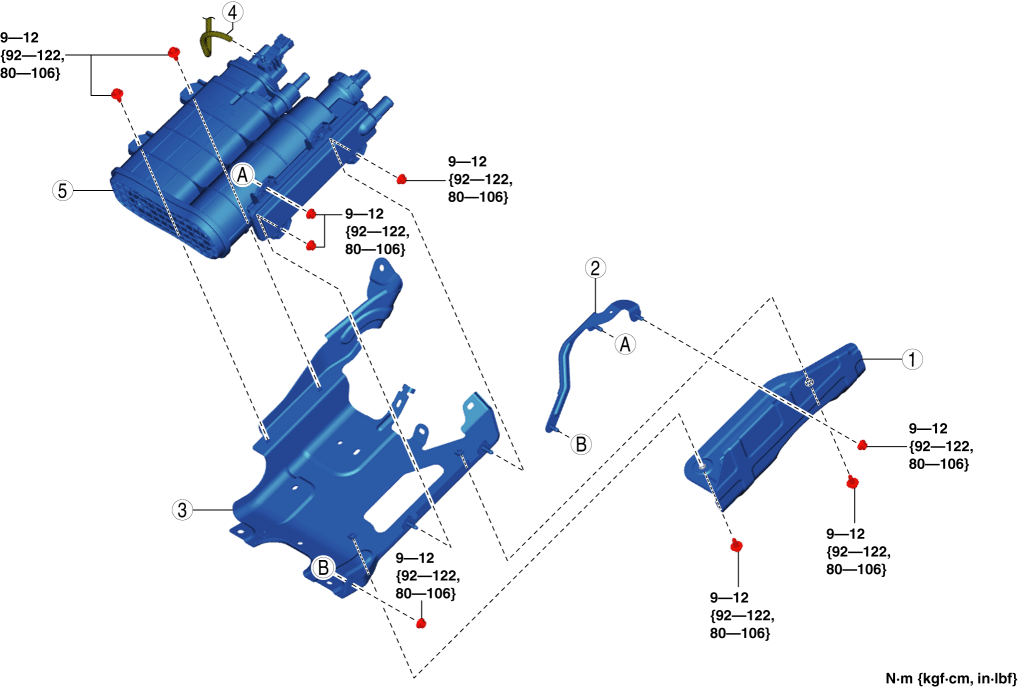
Insulator |
| 2 |
Bracket No.1 |
| 3 |
Bracket No.2 |
| 4 |
Evaporative hose No.1 |
| 5 |
Charcoal canister |
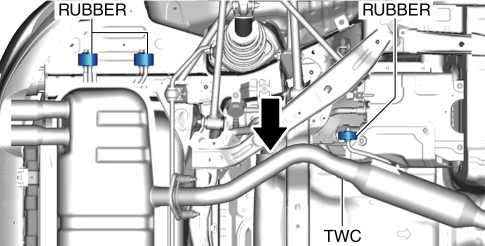
Charcoal canister component removal Note
1. Remove the rubber as shown in the figure.
2. Move the TWC as shown in the figure.
3. Remove the charcoal canister.
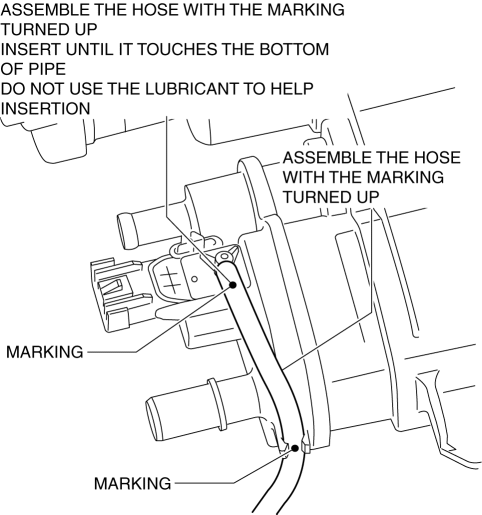
Evaporative hose No.1 installation note
1. Connect the evaporative hose No.1 as shown in the figure.
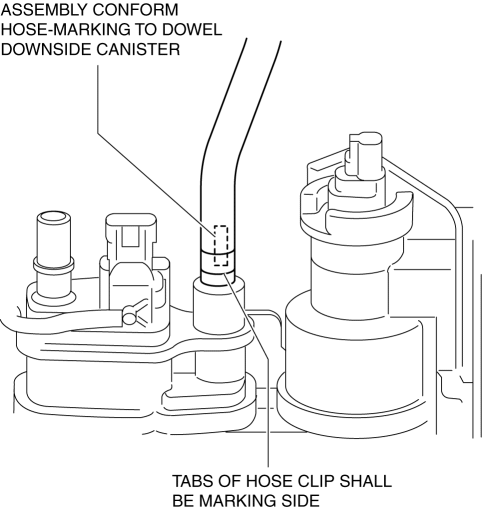
Evaporative hose No.3 installation note
1. Connect the evaporative hose No.3 as shown in the figure.
Evaporative hose No.2 installation note
1. Connect the evaporative hose No.2 as shown in the figure.
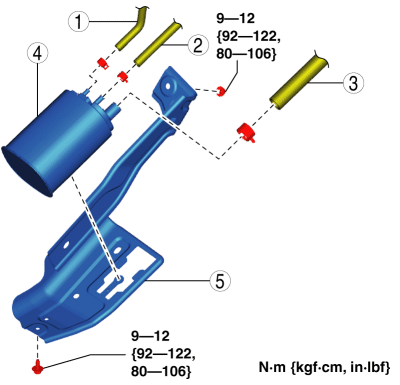
Except U.S.A. and CANADA Specs.
1. Remove in the order indicated in the table.
1
Evaporative hose No.2
2
Evaporative hose No.1
3
Evaporative hose No.3
4
Charcoal canister
5
Bracket
2. Install in the reverse order of removal.
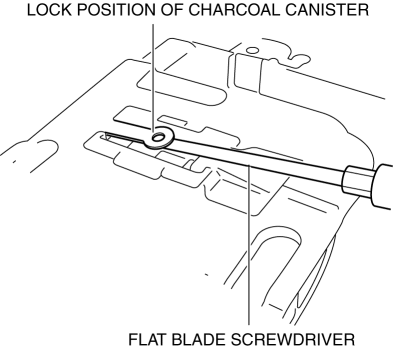
Charcoal canister removal note
1. Release the lock as shown in the figure.
2. Remove the charcoal canister.
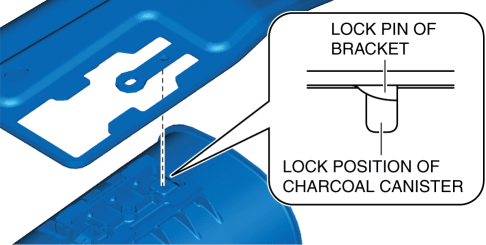
Charcoal canister installation note
1. Install the charcoal canister as shown in the figure.
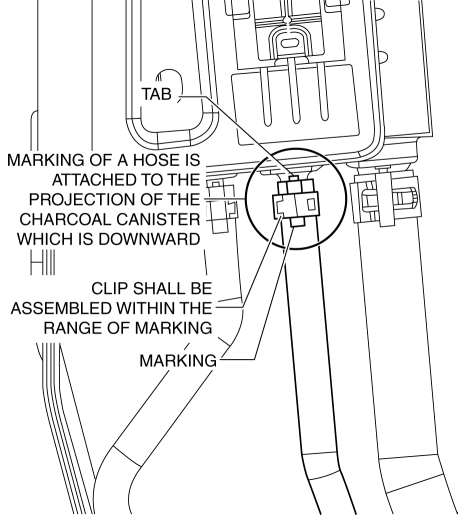
Evaporative hose No.3 installation note
1. Connect the evaporative hose No.3 as shown in the figure.
Evaporative hose No.1 installation note
1. Connect the evaporative hose No.1 as shown in the figure.
Evaporative hose No.2 installation note
1. Connect the evaporative hose No.2 as shown in the figure.< Previous Next >

