< Previous
Next >
LOWER LINK REMOVAL/INSTALLATION
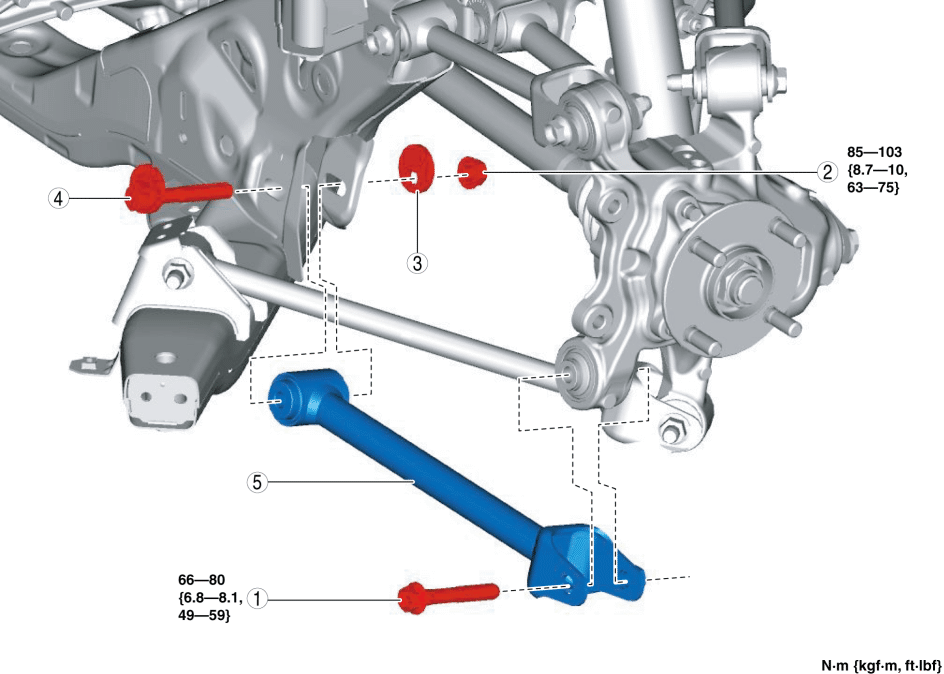
1. Remove in the order indicated in the table.
2. Install in the reverse order of removal.
3. Inspect the rear wheel alignment and adjust it if necessary. (See REAR WHEEL ALIGNMENT.)
| 1 |
Lower link outer bolt |
| 2 |
Lower link inner nut (See Adjusting Cam Bolt, Cam Plate and Lower Lateral Link Inner Nut Installation Note.) |
| 3 |
Cam plate (See Adjusting Cam Bolt, Cam Plate and Lower Lateral Link Inner Nut Installation Note.) |
| 4 |
Adjusting cam bolt (See Adjusting Cam Bolt, Cam Plate and Lower Lateral Link Inner Nut Installation Note.) |
| 5 |
Lower link (See Lower Link Installation Note.) |
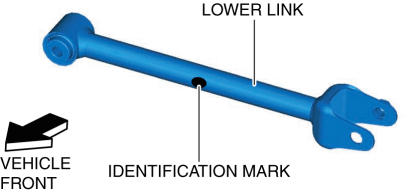
Lower Link Installation Note
1. Install the lower link with the identification mark facing the front of the vehicle.
Adjusting Cam Bolt, Cam Plate and Lower Lateral Link Inner Nut Installation Note
1. Insert the adjusting cam bolt from the front of the vehicle.
2. Point the calibration marking on the adjusting cam bolt and cam plate towards the upper side of the vehicle.
3. Tighten the nut to the specified torque.Tightening torque
85—103 N·m {8.7—10 kgf·m, 63—75 ft·lbf}
Lower Link Outer Bolt Installation Note
1. Completely tighten the lower link outer bolt when lifting up the vehicle.< Previous Next >Tightening torque
66—80 N·m {6.8—8.1 kgf·m, 49—59 ft·lbf}

